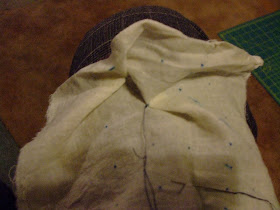
I knew both S and I wanted a sheer overgown with some draping of some description. In order to see what worked I used some very light calico, but I also experimented with old net curtains
That is my boyfriend's elbow in the background. He has told me to forward any requests for elbow modelling to him.
Plain pleats weren't really doing it for me, and I was still looking for a focal point. I remembered that I had been itching to use a technique since I had seen it used by Shirin on Project Runway season 6, when she won the
maternity dress challenge. She used one row of Canadian smocking to create a braiding effect. I gave it a try in the calico
Note the notes and bits of fabric samples pinned to the dress form! Also notice that we've abandoned the set in sleeve (for now anyway)
Here's a close up of some of the smocking. I tried different sizes, IIRC in the first picture the dots were 20mm apart, and in the one below they were 10mm
I made a matching trim for the top of the bodice
that would end in a drape at the front.
Here's the toile during a fitting (S was demonstrating different hairstyles)
When I was walking back up the aisle on S's wedding day, immediately after she was married, my mum grabbed me and asked "how did you do that braiding?". This was precisely the reaction I was after from my mum, she taught me to sew, so I wanted her to be impressed. So, for my mum, here's how to Canadian Smock.
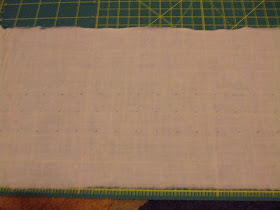
Step one is to mark your fabric. You need to create a grid of dots in squares. You need three lines of dots for the effect on the dress, but you can do more for a more woven effect
Hand sewing 101 = wear a thimble. So many people don't know how to (I was like them once). People sometimes think it goes on your non-dominant hand to protect from the point of the needle. In fact it goes on the middle finger of your dominant hand to protect your finger from the back of the needle as you push the needle through the fabric (this is especially important for thick or tough fabrics)
OK, actual smocking. You start at the dot that is one dot down and one dot right from the top left hand dot.
Secure the sewing thread and then go to the dot that is one up and one to the left of the dot you just secured your thread at
Pull the thread taut so the two dots come together
go to the next dot down (still in the central row where you started)
Do not pull taut and secure the thread with a knot
Now go to the dot one up and one right from the one you secured
Pull Taut
Next one down
Then up and to the left...
Continue like this, so secure at a central dot, up and to the left, secure at next central dot down, up and to the right, secure at next central dot down, up and to the left, secure at next central dot down, up and to the right... until you have done a row. Here's what the wrong side will look like
And here's the right side
To do another row, you repeat the process, but it's important to start at the right point so the rows mesh. In the picture below, the needle is ready to start row 2. It is directly to the right of the first dot from row one. (you will notice I messed up marking a row of dots, hence the crossed out dots)
Then you go up and to the left
next dot down
Up and to the right
and so on, until you reach the end of the row. You can add as many rows as you wish
here's the wrong side
And the right side
More rows give a woven effect and would be great for a panel on a cushion cover or a quilt.
For the actual finished dress, the fabric to be smocked was very sheer, and sewing thread would show through. In addition, I did not want to risk marking the fabric with disappearing marker. I got round the marking problem by marking a grid on pattern paper, which I pinned to the fabric and unpinned as I went along. The thread problem was solved by pulling a thread from the selvedge of the georgette. This was very fiddly, but I think worth it for the final look.
Canadian smocking is one of those things that can only be done my hand, it gives a really nice effect and says to those in the know "this was handmade"


Holy cow that is awesome! And so simple too, I have to go try that right this minute, thank you for sharing!
ReplyDelete